> For the complete documentation index, see [llms.txt](https://docs.mnspro.cloud/llms.txt). Markdown versions of documentation pages are available by appending `.md` to page URLs; this page is available as [Markdown](https://docs.mnspro.cloud/administration-my.mnspro.cloud/mnspro-cloud/gerateverwaltung/inbetriebnahme/android/alle-android-gerate.md).
# Alle Android Geräte
1. Setzen Sie Ihr Gerät, sofern es bereits installiert ist, auf Werkseinstellungen zurück
2. Drücken Sie auf dem Willkommensbildschirm auf **STARTEN**

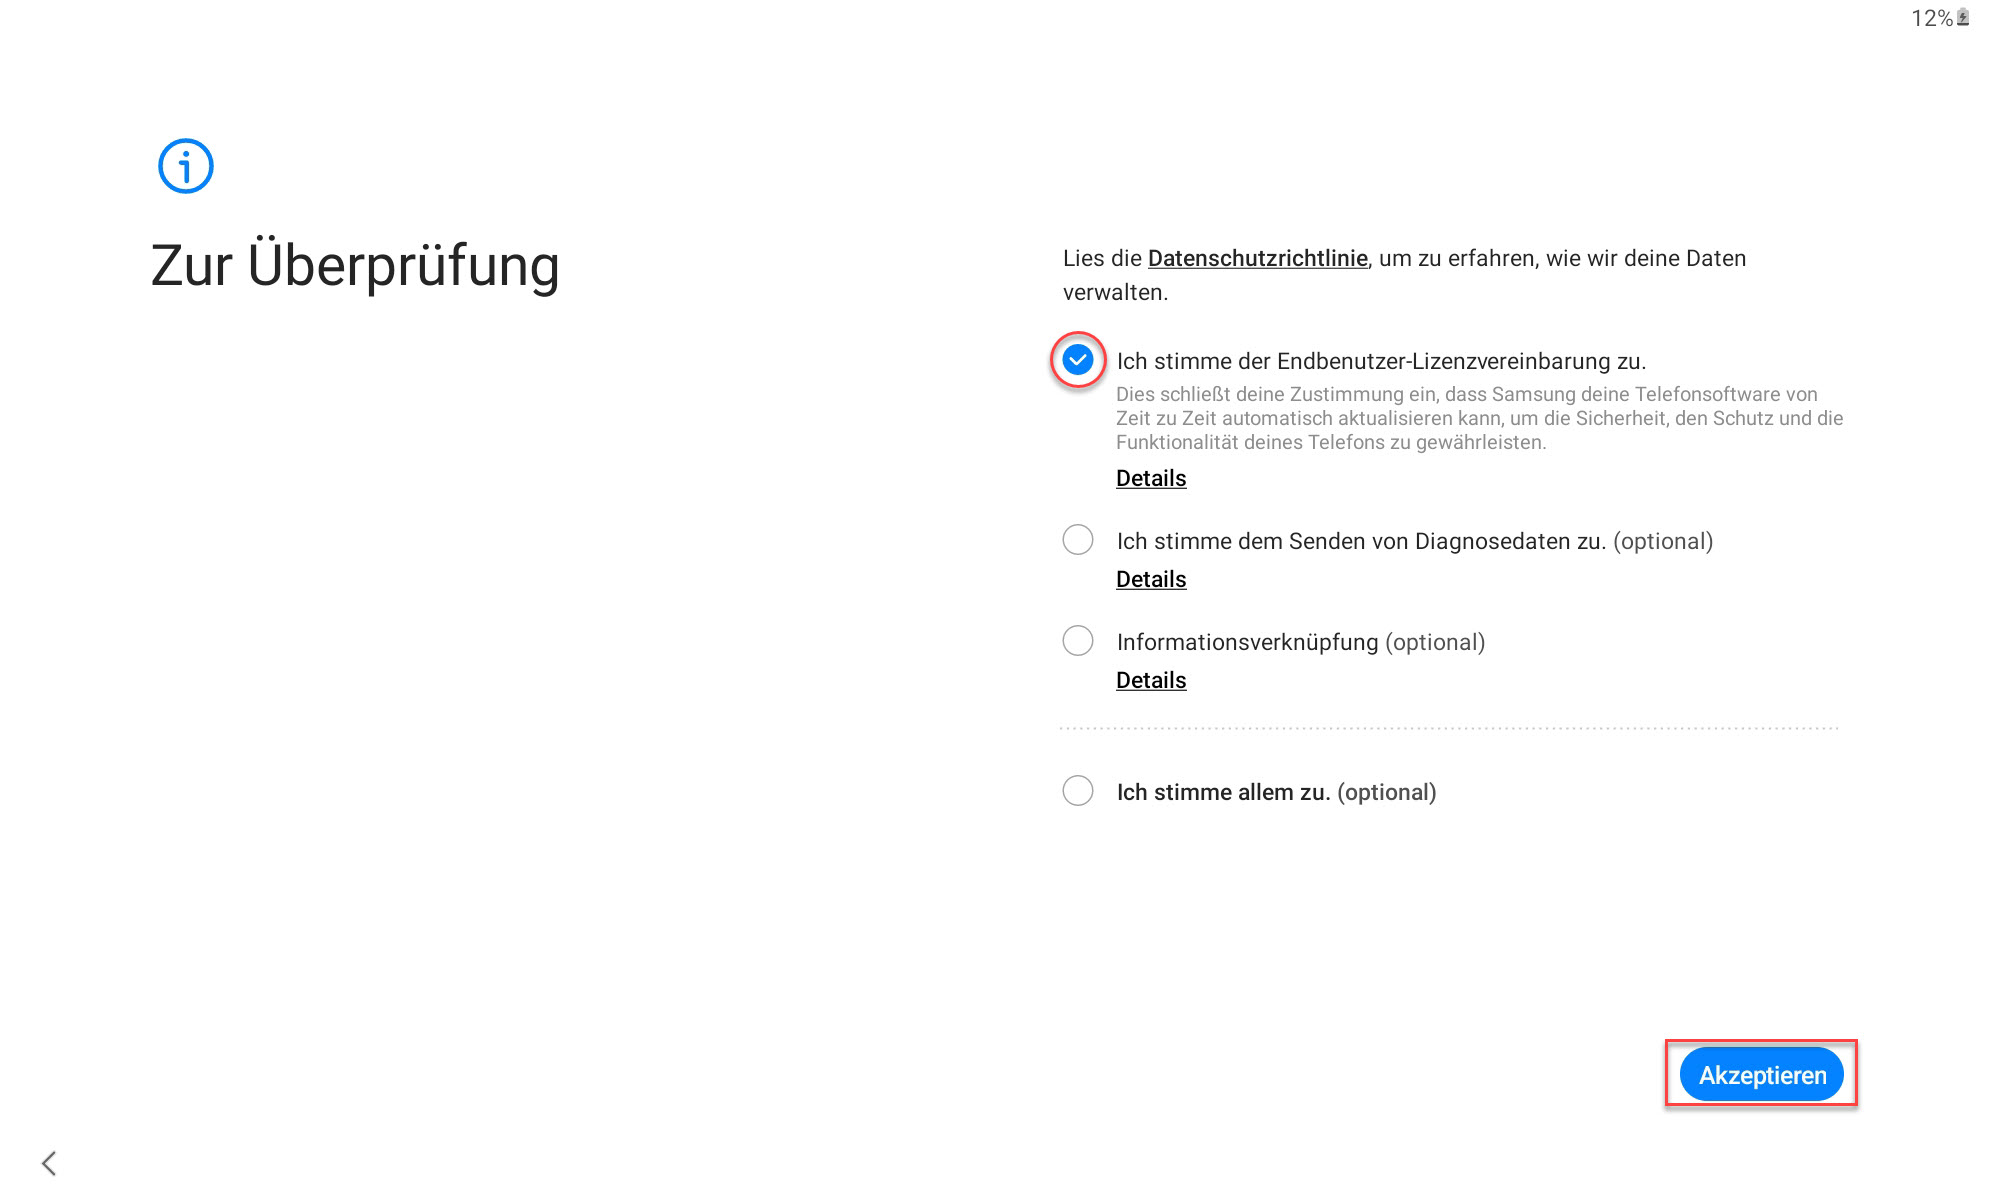
3. Stimmen Sie der „Endbenutzer Lizenz Vereinbarung“ zu und wählen Sie **AKZEPTIEREN**
Android - AGBs
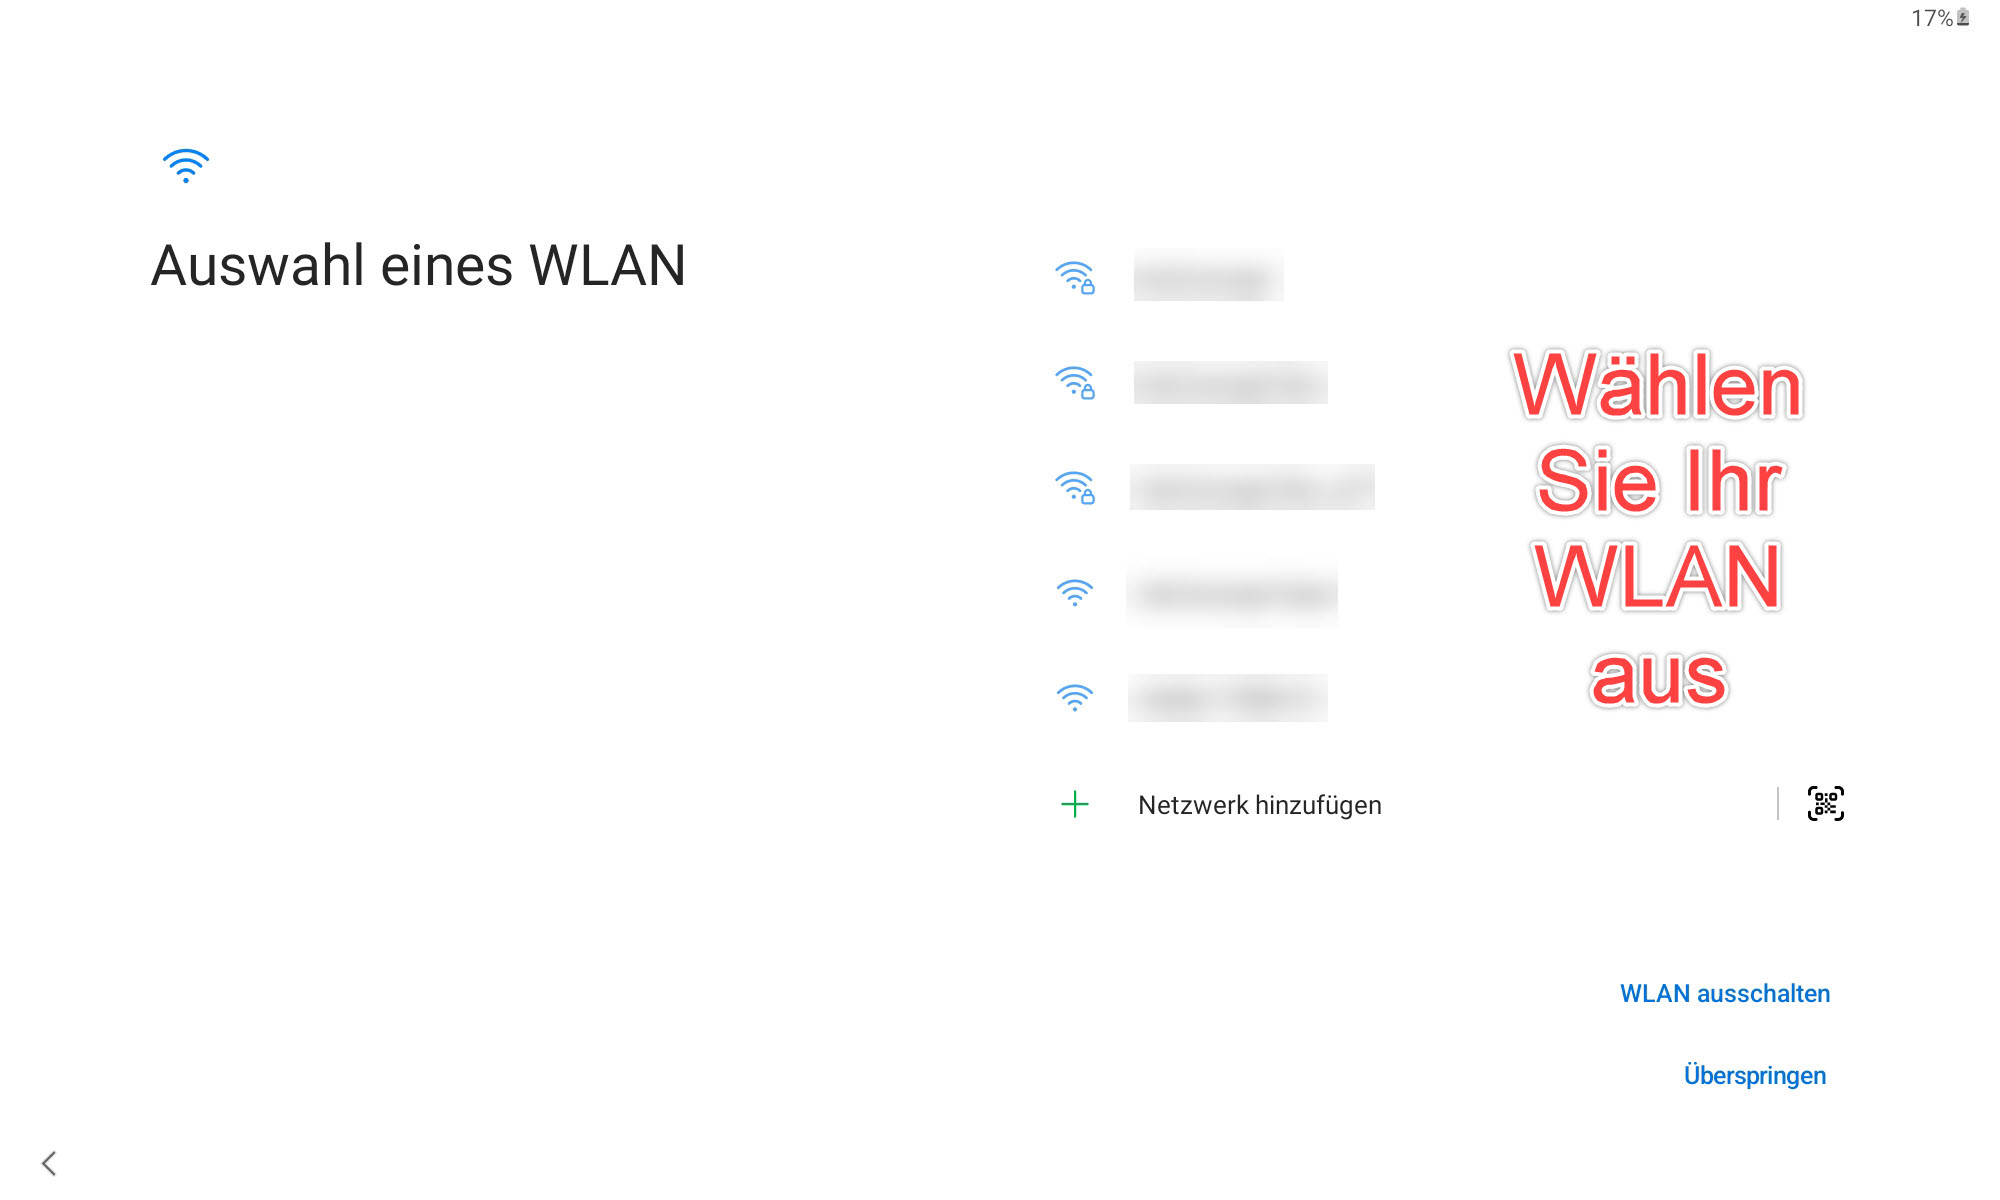
4. Verbinden Sie Ihr Gerät mit Ihrem WLAN und wählen Sie **WEITER**
Auswahl WLAN
5. Wählen Sie bei „Apps & Daten kopieren“ **NICHT KOPIEREN** aus

6. Geben Sie bei der „Google Anmeldung“, anstatt einer E-Mail-Adresse **afw#setup** an und wählen Sie dann **WEITER**

7. (Falls vorhanden, bestätigen Sie folgenden Bildschirm mit **WEITER**)

8. Falls Kamera vorhanden, wählen Sie **NUR DIESES MAL** und scannen Sie den von uns bereitgestellten QR-Code

9. Falls keine Kamera vorhanden ist, oder dieser Schritt nicht funktioniert können Sie unten anschließend **CODE MANUELL EINGEBEN** auswählen

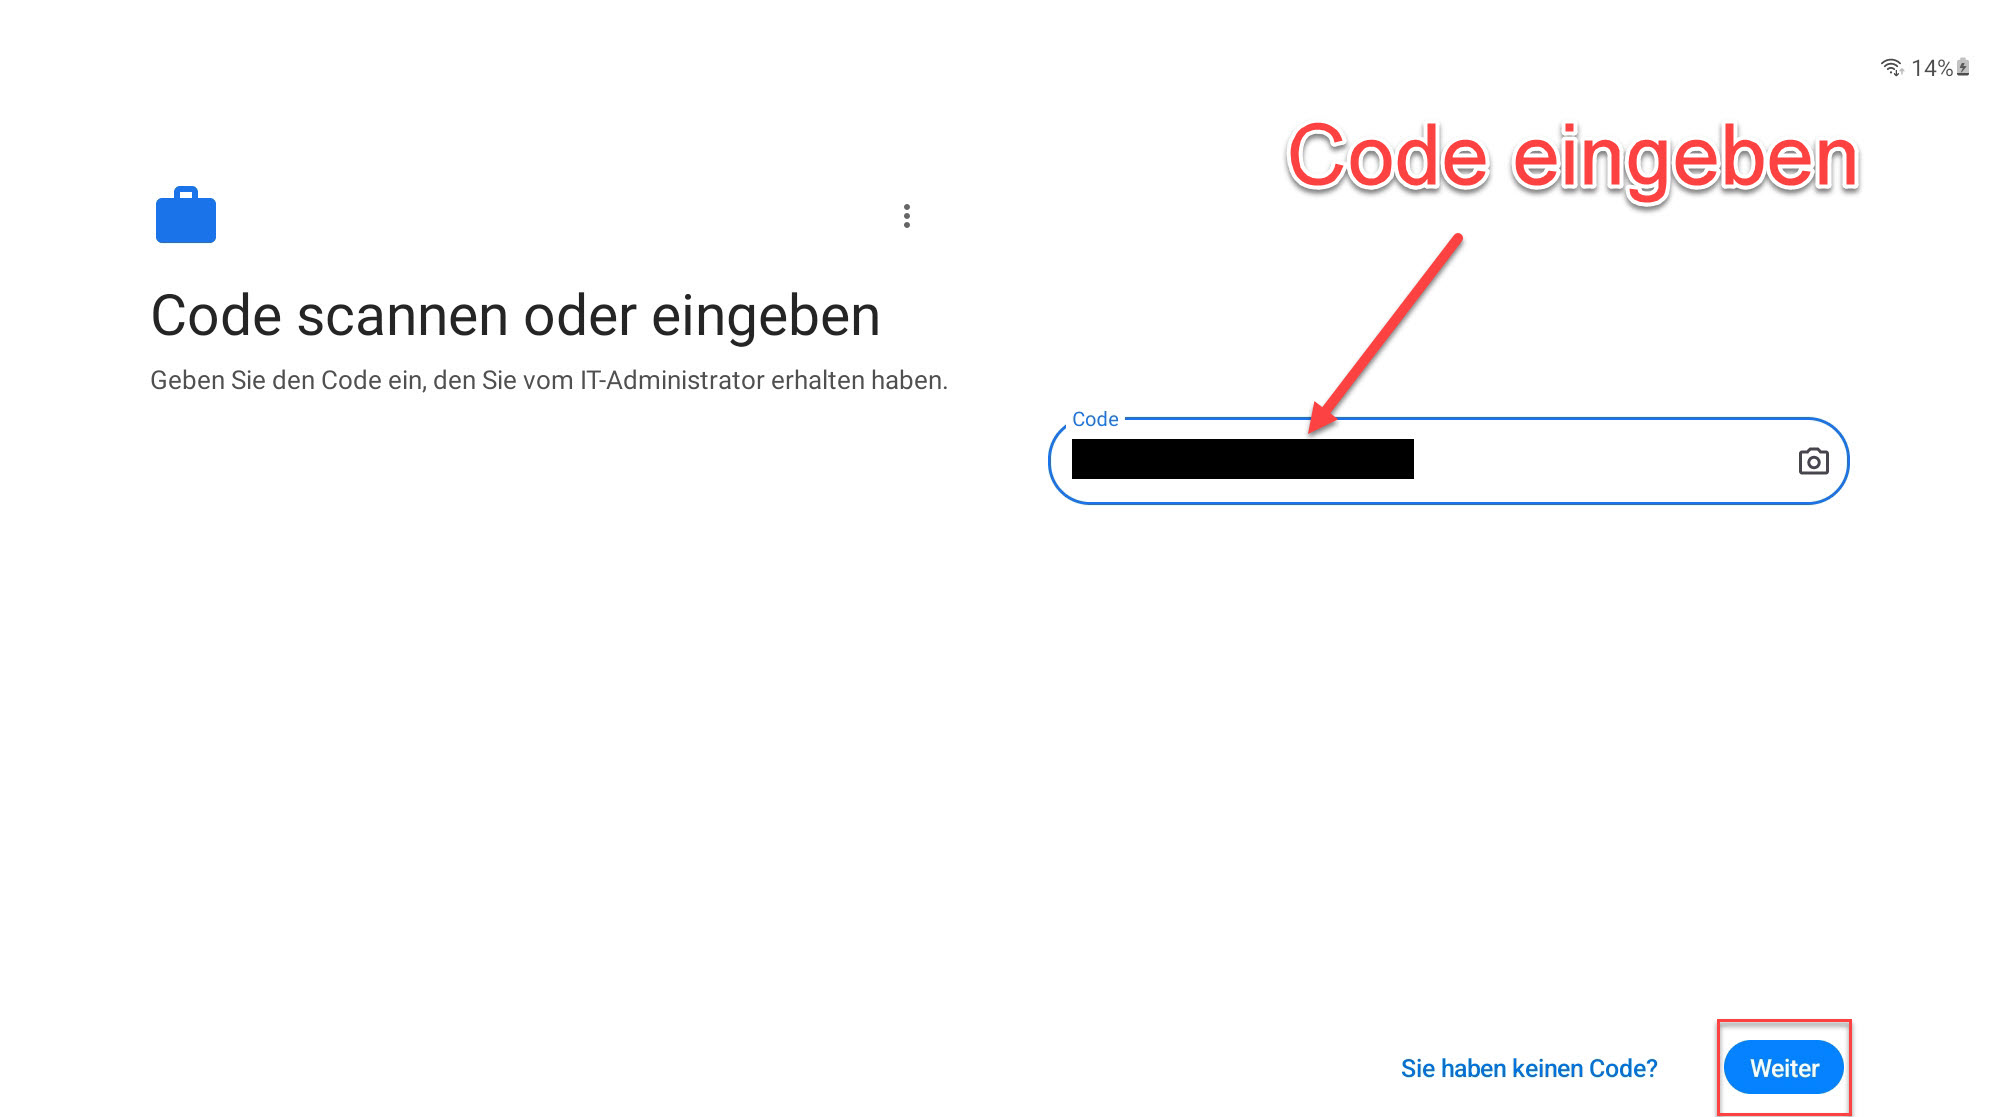
10. Geben Sie den von uns bereitgestellten Code ein und wählen Sie **WEITER**
Eingabe Code
11. Falls vorhanden, drücken Sie bei „Einrichten deines Telefons“ auf **WEITER**

12. Wählen Sie bei „Dieses Gerät ist nicht privat“ **WEITER** aus

13. Wählen Sie **OK** und haken Sie dann je nach Bedarf die verschiedenen Optionen an, danach drücken Sie auf **MEHR** und anschließend auf **AKZEPTIEREN**. Die Einrichtung sollte nun abgeschlossen sein.
  
14. Im Anschluss wird der reguläre Startbildschirm geladen. Alle voreingestellte Konfigurationen und Apps werden automatisch installiert.
---
# Agent Instructions
This documentation is published with GitBook. GitBook is the documentation platform designed so that both humans and AI agents can read, navigate, and reason over technical content effectively. Learn more at gitbook.com.
## Querying This Documentation
If you need additional information that is not directly available in this page, you can query the documentation dynamically by asking a question.
Perform an HTTP GET request on the current page URL with the `ask` query parameter, and the optional `goal` query parameter:
```
GET https://docs.mnspro.cloud/administration-my.mnspro.cloud/mnspro-cloud/gerateverwaltung/inbetriebnahme/android/alle-android-gerate.md?ask=&goal=
```
`ask` is the immediate question: it should be specific, self-contained, and written in natural language.
`goal` is optional and describes the broader end goal you are ultimately trying to accomplish on behalf of the user. GitBook uses it to tailor the answer towards what is most useful for that goal.
The response will contain a direct answer to the question and relevant excerpts and sources from the documentation.
Use this mechanism when the answer is not explicitly present in the current page, you need clarification or additional context, or you want to retrieve related documentation sections.